Have you been thinking of me? I certainly have not forgotten you! I've been busy and sewing between the holidays and regular days since my last post. It's now about time I brought my friends and readers up to date on the specifics of these activities.
One thing I've begun since moving cross country (about a year ago) began because I currently have no dedicated sewing space. I now have begun to work on multiple projects simultaneously. It's only because when I cut something out (my least favorite part of the process), I must clean up and return the area used back to its original appearance. So, I seem to have begun to cut out multiple projects at a time. It's fine, but I've always been a 'one-project-at-a-time' sewist, so it seems to be taking me a longer time to get anything to the point where I can blog about the process. I rarely hoard fabric or purchase it without a specific project in mind. I worked at a fabric store during my son's last two years of high school and accumulated a lot of fabric at a substantial discount during those years. Moving (and paying to move) lunks and trunks of this yardage cured me of hoarding. Don't misunderstand, I still love beautiful fabric, so when the fabric is purchased, the next step is to cut the project out, organize it with the associated notions, and work on it with the hours or minutes I have available. With that as a background of how my life currently works, I will share with you how my current minutes have been spent.
The things I seem to sew are things that make me stretch my talents and keep me open to new sewing experiences. Most of the time, the projects I select appear nowhere else on internet blogging sites (like patternreview.com or the personal blogs on blogger.com or wordpress), so there are very few sewing hints or completed examples of identical projects posted by others. I feel more like a pioneer in the sewing world. Part of that is because I have been sewing for so many years, the 'standard solid-color-shift-dress' sort of sewing doesn't seem to interest me any more. New and interesting designers do, though....and working with new and interesting fibers and textiles....and incorporating my other talents (cross stitch/embroidery/silk ribbon embroidery/quilting) keep my creative projects interesting.
I did take everyone's lead and create a dress from the ever-popular Vogue 1314 by Tracey Reese. I bought an ideal soft, patterned knit fabric from the local Hancock sale table for it. My sister (another seamstress) copied me and rushed to the local store buy two yards for her own version in another color. I had no problem with her actions because we've had many, many sewn items in our closets that are from the same pattern since we were little girls. We always end up in identical clothing in different colors, and the picture below proves how proud we were of my mothers sewing talent (and our new bicycles). lol
Weren't we adorable????? Bows and all!..hahahahaha!!!!!...My sister would die if she knew I posted this pic, but you won't tell her, so she will never know...right? I would have rather shown another pic of us at Easter in some identical frocks we wore that year. She and I recently laughed long and hard about our holiday outfits as tried to remember which color hers was versus mine. She didn't have a copy of the picture and mine remains packed away.....so, instead you get this little glimpse into our history. We are a year apart in age and a size apart in clothing. I think her interest in sewing no longer keeps pace with mine, but, she remains a creative individual and my creative backboard with a very good eye for style and 'the arts.'
This pattern had been produced many times, so I was able to incorporate some design changes to improve the fit. Invaluable were the suggestions made by Sarah, one of my favorite bloggers, posting to Goodbye Valentino. I had already completed my dress by the time she wrote the blog about this pattern, but I went back and opened the side seams to incorporate the changes she suggested. It improved the garment dramatically, and I plan to make it again with the RTW changes the designer made to the original dress. Also...thank you, Andrea (posting from Knit-Knac.blogspot.com) for the inspiration for my second version of this dress....I love this dress and the changes she plans to make to it; I am currently seeking the ideal fabric to duplicate the new version of this pattern, too.
Wow!...my blogs are too long....but I can't leave without telling you about a couple of other projects 'in-process.' This second one is taking a long time to cut out. It took a long time to find the fabric and a few additional days to read the pattern instructions to make sure I understood the construction process.
My non-sewing machine handwork includes cross stitch. My current project is a little black girl in a yellow dress. The pattern was purchased from an Etsy vendor, and I am working diligently on this every day for the past month or so. She reminds me of my childhood when the neighbors used to refer to me as that 'big-legged girl.' As you see, she has braids and ribbons, too, so she holds a special place in my heart. I'm not sure if she will become a pillow or be framed on my wall, but she will be one of a pair of little black girls whose charts are waiting to be completed. I know, more of tedious work that calms me and currently strains my eyes. I am getting older....
I goofed putting together the belt buckle, so I am re-doing that portion of this project. It also includes a lapped zipper....I still detest the invisible type, but, I am getting better at them. This vintage dress required an old fashioned installation at the side seam. I'll show you the result on my next post. It's been fun!...comment any time. If I've omitted anything, please ask....I love comments and appreciate hearing from everyone who visits!
One thing I've begun since moving cross country (about a year ago) began because I currently have no dedicated sewing space. I now have begun to work on multiple projects simultaneously. It's only because when I cut something out (my least favorite part of the process), I must clean up and return the area used back to its original appearance. So, I seem to have begun to cut out multiple projects at a time. It's fine, but I've always been a 'one-project-at-a-time' sewist, so it seems to be taking me a longer time to get anything to the point where I can blog about the process. I rarely hoard fabric or purchase it without a specific project in mind. I worked at a fabric store during my son's last two years of high school and accumulated a lot of fabric at a substantial discount during those years. Moving (and paying to move) lunks and trunks of this yardage cured me of hoarding. Don't misunderstand, I still love beautiful fabric, so when the fabric is purchased, the next step is to cut the project out, organize it with the associated notions, and work on it with the hours or minutes I have available. With that as a background of how my life currently works, I will share with you how my current minutes have been spent.
The things I seem to sew are things that make me stretch my talents and keep me open to new sewing experiences. Most of the time, the projects I select appear nowhere else on internet blogging sites (like patternreview.com or the personal blogs on blogger.com or wordpress), so there are very few sewing hints or completed examples of identical projects posted by others. I feel more like a pioneer in the sewing world. Part of that is because I have been sewing for so many years, the 'standard solid-color-shift-dress' sort of sewing doesn't seem to interest me any more. New and interesting designers do, though....and working with new and interesting fibers and textiles....and incorporating my other talents (cross stitch/embroidery/silk ribbon embroidery/quilting) keep my creative projects interesting.
I did take everyone's lead and create a dress from the ever-popular Vogue 1314 by Tracey Reese. I bought an ideal soft, patterned knit fabric from the local Hancock sale table for it. My sister (another seamstress) copied me and rushed to the local store buy two yards for her own version in another color. I had no problem with her actions because we've had many, many sewn items in our closets that are from the same pattern since we were little girls. We always end up in identical clothing in different colors, and the picture below proves how proud we were of my mothers sewing talent (and our new bicycles). lol
 |
| 'The Girls' Back in the Day in Nebraska |
Weren't we adorable????? Bows and all!..hahahahaha!!!!!...My sister would die if she knew I posted this pic, but you won't tell her, so she will never know...right? I would have rather shown another pic of us at Easter in some identical frocks we wore that year. She and I recently laughed long and hard about our holiday outfits as tried to remember which color hers was versus mine. She didn't have a copy of the picture and mine remains packed away.....so, instead you get this little glimpse into our history. We are a year apart in age and a size apart in clothing. I think her interest in sewing no longer keeps pace with mine, but, she remains a creative individual and my creative backboard with a very good eye for style and 'the arts.'
 |
| Vogue 1314 Photo courtesy of McCalls Patterns |
This pattern had been produced many times, so I was able to incorporate some design changes to improve the fit. Invaluable were the suggestions made by Sarah, one of my favorite bloggers, posting to Goodbye Valentino. I had already completed my dress by the time she wrote the blog about this pattern, but I went back and opened the side seams to incorporate the changes she suggested. It improved the garment dramatically, and I plan to make it again with the RTW changes the designer made to the original dress. Also...thank you, Andrea (posting from Knit-Knac.blogspot.com) for the inspiration for my second version of this dress....I love this dress and the changes she plans to make to it; I am currently seeking the ideal fabric to duplicate the new version of this pattern, too.
 |
| Vogue 1314 Front Neckline |
Wow!...my blogs are too long....but I can't leave without telling you about a couple of other projects 'in-process.' This second one is taking a long time to cut out. It took a long time to find the fabric and a few additional days to read the pattern instructions to make sure I understood the construction process.
 |
| Vogue 8957 Image Courtesy of McCalls.com |
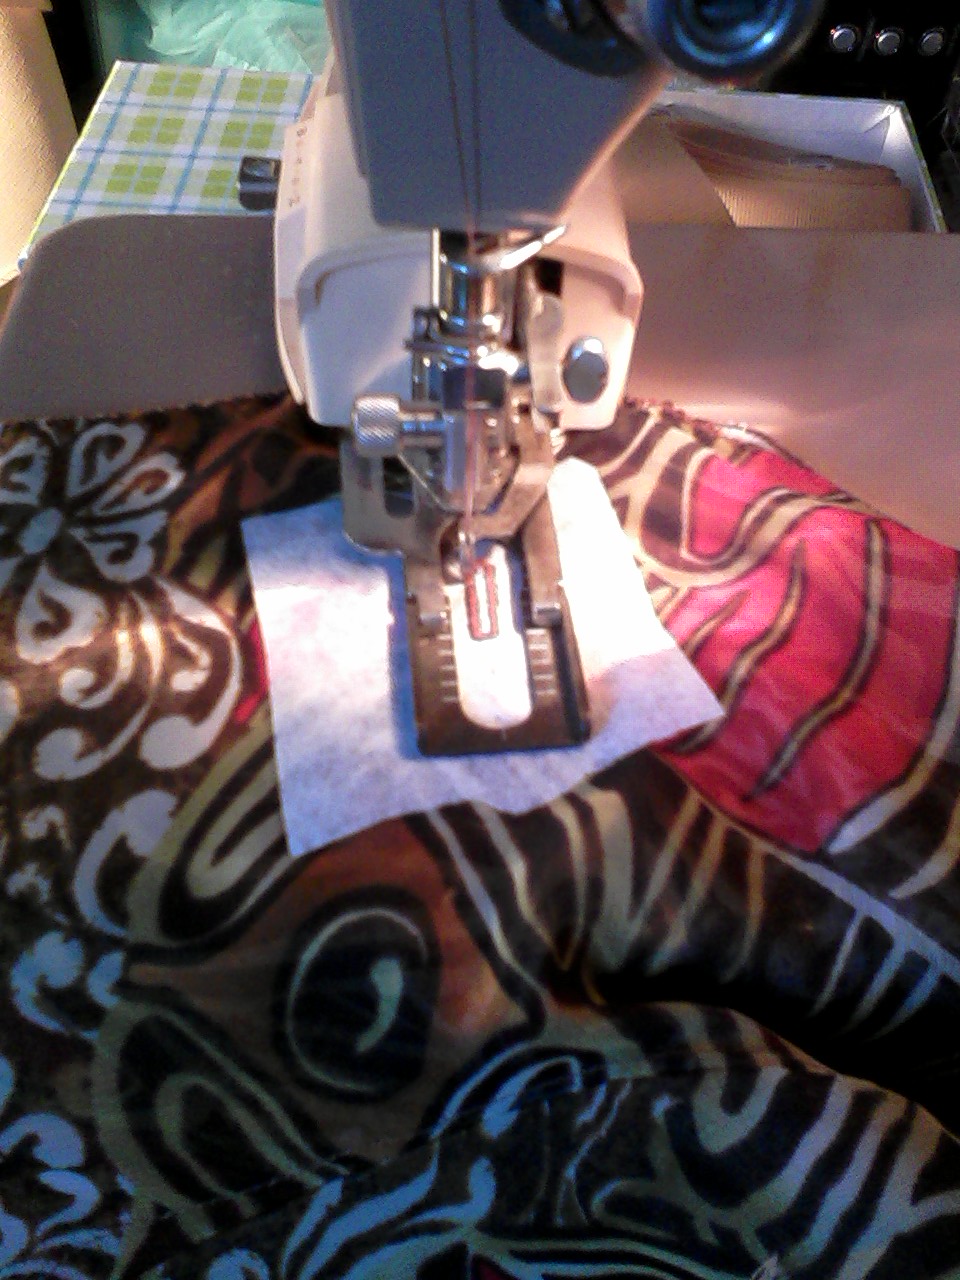
I LOVE this evening jacket! I am making View B (shown above) which is sleeveless by design, but I will be adding the tiny cap sleeve from View A. The jacket is fully lined and is put together by joining a series of split circles lengthwise (the number depending on the size you are creating). The pattern in my size required 5 yards of fabric 60" wide. The instructions suggest a template be made for the three circles, and they be cut from the yardage a total of 68 times...that's right....no typo...sixty-eight times! The circles are joined by french seams (my choice) and the edges of each ruffle are to be double-rolled after staystitching. I don't recommend this project to anyone fearful of handwork or as I've seen it called "fiddly" handwork. It will be beautiful, though....and I will keep you posted on my progress.
 |
| Vogue 8957 Over 60+ pieces of fabric! |
My non-sewing machine handwork includes cross stitch. My current project is a little black girl in a yellow dress. The pattern was purchased from an Etsy vendor, and I am working diligently on this every day for the past month or so. She reminds me of my childhood when the neighbors used to refer to me as that 'big-legged girl.' As you see, she has braids and ribbons, too, so she holds a special place in my heart. I'm not sure if she will become a pillow or be framed on my wall, but she will be one of a pair of little black girls whose charts are waiting to be completed. I know, more of tedious work that calms me and currently strains my eyes. I am getting older....
 |
| Little Girl in a Yellow Dress Cross Stitch |
Okay....that's all for today. This post has taken too long to compose. I hope you enjoyed the update. I haven't told you about my Easter dress because its soo springy and the weatherman is predicting another snowstorm tonite in my area.....sigh! I will also include my completion of a summer version of the ever-popular Vogue 8728.
 |
| Vogue 8728 Photo Courtesy of McCalls.com |
Remember....Keep going....one stitch at a time!....