Monday, May 7, 2012

Waiting for Vogue Patterns to Answer....

You haven't heard from me in a while, but that doesn't mean I haven't been sewing.

Let's see....

A new grandson arrived about 8 weeks ago, so I've been putting together little things for him.  His middle name is Drake, so his Dad has asked that I make him his own dragon (which is a derivation of 'Drake'). So, of course, it is in process.  (Isn't he a cutie-pie?)

Grandson #2

I am also in the midst of preparing for the upcoming June family birthdays (my only sister and my eldest niece).  I usually make gifts and stay away from trying to finance what I would really love to purchase for them.  So, that pressure is on, too.


Since my last post I have also completed a king-size quilt and have decided to send it off to be quilted by someone with a longarm quilting machine.  The quilt is to be raffled off by a social club I belong to.  Initially, the club members agreed to participate in its construction, but in the end no one pitched in (should I be surprised?).  I managed to get through it with the help of one member, and will now send it off to be professionally quilted before I put the binding around it.  I'll let you know how this new experience turns out.


The baby quilt for my eldest niece's baby is also completed, but I am still deciding whether to purchase a Flynn Multi-Frame quilter and suffer through the learning curve to finish the small quilt myself.

I have finished the Vogue coat I mentioned in my last post, but will show you pictures on the my dress form on my next post.  I really just wanted to post this entry to ask you a question....

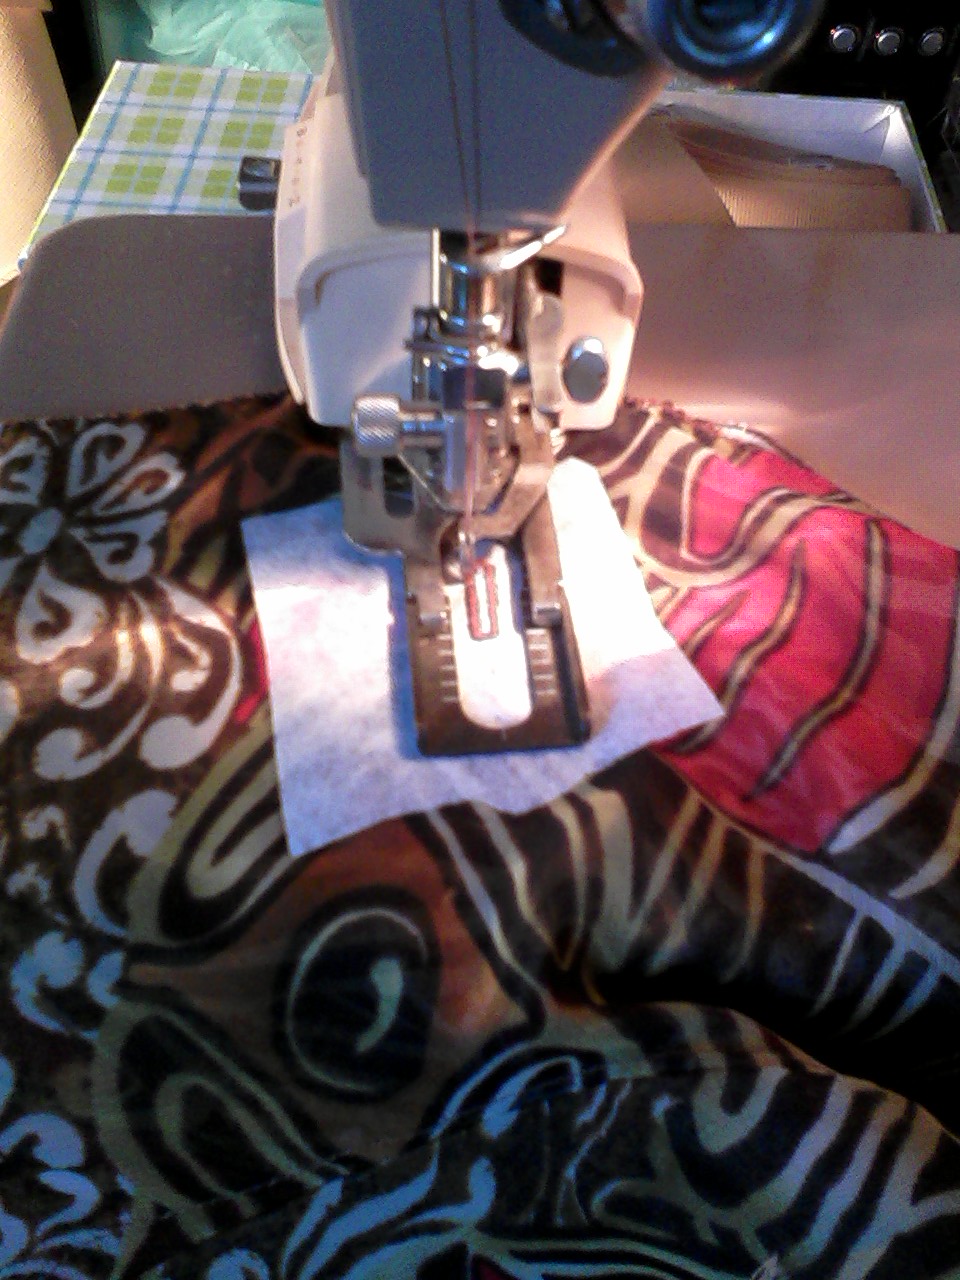
I recently looked at the new Vogue patterns and fell in love with the white Lialia dress pattern by Julia Alarcon (Vogue 1305).  I was so excited about making the dress, I purchased the pattern at the very end of the previous pattern sale.  I have since purchased the fabric for the pattern and begun to cut it out.  This is only a problem because I have noticed an error (?) in the layout for the dresses lining.

This pattern has extra-long pieces that must be joined prior to cutting (in addition to requiring each piece be cut on single-layer fabric--but that's another topic).  The dress' lining layout shows different piece numbers joined together than the cutting layout for the fashion fabric.  Has anyone else run into a problem where the layout (or sewing instructions) have an error?  What did you do/what would you suggest I do?

I have sent an email to Vogue regarding this matter, but am unsure if I should wait to hear from them.  Has anyone else made this dress already or have a solution for my question?  If you have already purchased this pattern, would you take a look at the instructions and tell me if I am wrong?   The lining layout shows piece 1 (top) joined with piece 3A and piece 3 (top) joined with piece 1A.  Is there ever a logical reason for the pattern pieces to switch like this?

I certainly have a lot to do while I wait to hear from them.  In the meantime, I would certainly like to hear from you!

Great stitching....keep going....one stitch at a time!...

Cynthia

Wednesday, March 21, 2012

My Final Four

For those that wondered what had become of me, I wanted to let you know I am still alive....reading and sewing to my hearts content.  I discovered how much the horrible mattress at my mother's had contributed to my back issues only after moving and sleeping on a really good mattress.  I have also discovered how much the dust (and possibly the mold) had contributed to my persistent allergies following the move, as well.

My mind has rested and I have made a concerted effort to complete all the sewing projects I organized into plastic bags during my days of preparation.  Some are simple toys for my great nephew, others are projects for my (very) soon-to-arrive third grandson.  Others are the patterns to be altered for new dresses, skirts and tops for myself.

First up?....the simple hand puppets for my great nephew.  These were made from Butterick 4209
 using fleece left over from previous pajama and robe projects.  I made four of them: the monkey, the kitty, and two bears.  They all came out so cute...nothing you would see in real life!

Spotted Monkey

Fiery Kitty with a gigantic bow tie

Bear with a self-drafted tie

Camouflage Bear with self-drafted fringed scarf


My favorite is the unusual-patterned monkey.  I put pipe cleaners inside the tails of both the cat and the monkey, and this small step added so much character to both puppets.  I hope he enjoys them!

Now...don't worry that I have suddenly shifted away from sewing clothing...I haven't.  The past year or so has been difficult because of my move.  These are the final quick projects I organized for completion in-between my 'serious' sewing.  I made this great-nephew the same mouse I made for my second grandson, and it will go in the same box these puppets are shipped in.  These are my final four projects for him, and now I will move forward with more classic clothing sewing projects.


Now, I am off to begin the Hong Kong seams on my next project:   Vogue 1129.  Most sewists know how long this pattern has been available, and since I am a fan of anything that has something draped over the shoulder, it has been cut out for a loooong time waiting to find the right fabric to turn into the bias tape required to complete an interesting feature on the seaming (the coat is unlined).

Stay tuned...and thanks for stopping by!....
Keep sewing....one stitch at a time!....

PS:  My third grandson arrived in the world yesterday (March 19), and I have come to grips with the fact that I won't be sewing any pretty little dainty dresses or christening gowns for a little granddaughter.  {{{sigh....}}} :)


Welcome, Simon!!!!  Grandma loves you madly and am already planning things to create especially for you!

Tuesday, February 14, 2012

As I Back Out the Door....

The last few weeks of clearing the belongings left in my childhood home have been really, really stressful.  The circumstances under which the ol' homestead is being sold brings to the surface all the childhood memories from 1961, the year our Buick deposited our clan from the Nebraska flatlands to grow up in the middle of a growing area soon to be identified as Silicon Valley.  I will be sad to leave, even though I have always felt 'mid-western' and have shed the 'California-girl' mindset and beach goddess figure pressures I felt as an adolescent transplant.  Why did we come?  My sister's fragile health issues and the better California school system (at that time) was what they told us kids.  It was hard leaving our neighborhood and childhood friends and grandparents.  Sorting through papers left behind, there were also other skeletons rattling the leaves of the family tree that clarify why that dramatic decision was made.  Secrets were buried when my father suddenly died within 3 years of our arrival.  My mother never moved from the house my Dad bought for us, and amassed an amazing pile of what I can only refer to as 'stuff' in the 50+ years she lived here in a further attempt to bury family secrets.  

"The Kids"(c)
...And I'm moving the 'stuff' left in her wake.  I am now so removed from considering the value of these tangible 'things' I feel quite free to donate and trash the stuff I previously planned to sell for a king's ransom.  At this late date I'm literally giving everything away and not giving it another thought.  That's a good thing, right?  I did decide to repair and store my grandmother's Domestic (converted) treadle machine, the family picture albums and documents to further investigate and document my family tree.

Because this house is where I began (machine) sewing, I suddenly felt I wanted to consciously complete one more garment before I left the familiar walls, sounds and lighting of this house.  Of course, my way of releasing tension is to immerse myself in some mind-numbing stitching, so I dug out Vogue 1199 and the fabric had cut out a while ago.

Vogue 1199 rear view (untucked)
Photo courtesy of McCalls.com 
Since no one has previously reviewed this blouse on patternreview.com, I will attempt to post my first review of this garment there later this week.  Someone did complete and review the skirt included in the pattern (with positive comments), so I will add it to my list to complete from a yet-to-be-found wool gabardine.


Vogue 1199 front (untucked)
Photo courtesy of McCalls.com
Vogue 1199 front
Photo courtesy of McCalls.com

So, here follows some visual views of my version....


Front

Back

Fringed Ruffle close-up
If you don't look closely, you could miss the pintucks on the front and back of the top.  I think there are approximately 20 on the front and a similar number on the back.  These tucks were my meditative touchstone for a couple of hours each night.  The most difficult part of the process was marking them.  This particular garment demands proper marking.  The sleeve swirl (what I call the ruffles within the sleeve), collar ruffles and sleeve hem are finished with fabric strips cut on the straight grain and frayed 1/4" at the edges.  

Stay-stitched Edging 

Front Pintucks
Be sure to pull the single thread cross grain to ensure this pattern piece is perfectly straight on grain (pattern piece #9).  There is a reason I know what can go wrong here...lol.  Using 60" fabric, you would only need to purchase another 1/8th yard.  Using fabric 45" wide, this helpful hint will not help you...devising how to invisibly join the end will need to be created.  The shirt tail hem is a simple edgestitch.  A single button closes with a fabric loop at the neckline.  I moved the loop higher than it appears in the photograph.  I haven't picked the button yet (here I come Stone Mountain & Daughter!). The fabric was on sale for $1 yard at a JoAnn's sale and is a shrimp-colored lightweight polyester crepe.

Beside taking the time to complete each step to the best of your ability, I only have two construction suggestions:  

One.....cut the pattern piece for the ruffles at least 7"-8" longer in order to avoid piecing the strips.  None of the strips were long enough to completely cover the required edge without piecing them.  

Two...As you complete each tuck, take the time to tie off and trim the threads of each one at the top and bottom.  I didn't do this (sigh...) and now have to devote an evening to tying off these threads.  

I had a great time doing this blouse and plan to do another one.  I have a similar weight crepe in white and will dig it out of one of the bins I have packed and sew it for this spring/summer.  This blouse requires a lot of marking and basting.  If basting is not your thing, this may not be the project for you.  The next one will have an FBA adjustment and I won't be moving!...lol

Thanks for dropping by and reading about my latest sewing project!  In preparation for my move I have many projects cut, marked and ready to sew.  I hope you continue to stop by to see what I'm doing and share your thoughts in the coming months.  Please excuse the picture quality....for some reason some of them are so fuzzy I  had to resort to including cell phone photos as replacements.

I will be seeking out new notions at a nearby quilt show next weekend (free!) with a sewing buddy of mine.  I hope to test run some new sewing machines, overlocks and blind stitchers.  The sewing blogosphere has shown me my beloved Singer 401 is not the only girl on the block....lol    Happy Valentine's Day!

What do you do to relieve stress?  Do you take it one stitch at a time or use another activity? 

Tuesday, January 24, 2012

A Dragon and a Giveaway!

I had hoped to blog more during December, but I've come to understand how time gets away from you and before you know it.....you're paying another mortgage payment.  I'd like to thank all those who have hung in with my erratic posting and continue to follow me.  I would love to hear from more of you, and hope to provide the environment where you will feel free to tell me more than how 'wonderful' my talent is or how 'wonderful' I look wearing my clothes.  I want it to be more than that when you drop by here to tell me something or see what I'm doing.

I managed to move through the 2011 holiday season while showing my childhood home to the many realtors and buyers making appointments.  It sold really quickly and I have been busy in the interim packing and selling the multitude of things my mother hoarded and stuffed in any open area available during her 55-year residence here.  I am exhausted and will be glad to pack the few things I brought with me while caring for her.  I am shocked how much I'll be dragging back to re-establish my own household, once more.  There are a lot of books, a lot of fabric, and a dog.  Much more than I thought I'd have at the end of a stay I thought would be a maximum of 6 months.

Anyway, I discovered sewing blogs about 2 years into my stay here, and I thank each and every one of you who labored over words and pictures communicating your love for something I love, as well.  In celebration of your efforts, I am hosting my first GIVEAWAY!  The pattern below is only one of the many finds uncovered while I sorted through dusty trunks and bins of long-forgotten sewing patterns, thread and fabric.  These patterns will be part of an ongoing list of what are now called 'vintage patterns'  will be giving away.

This one is from the 70s (not at all a vintage year to me), nevertheless, not a pattern I will use or wear (been there--did that), so this wardrobe pattern will be offered first.  It is unused and uncut, size 14 (bust 36") Simplicity 7813.  (Looks a little 'Tracey Reese,' no?)  I'm sure the pattern number has been used before, but this was back when patterns cost 75 cents!

Were you alive then?  Leave me a comment telling me what you were sewing in the '70s and you will qualify for one entry in the giveaway (one per person, please).    I would love to meet you and find out how alike/different our sewing experiences are!

Giveaway Pattern:
Simplicity 7813 - size 14

This pattern is a lined, mini-coat with empire waistline, a collar, front button closing, back pleats, long set-in sleeves, optional top-stitching, flaps and pockets.  The pants and A-line skirt have side zipper and waistband.   The random drawing for this giveaway will take place February 10, 2012 at 6pm PST.  I will open the giveaway up to everyone....including international reader/bloggers.   Let's get to know one another!  I love conversation, so my comment section is already set to begin threaded conversations.  As my grandsons say, "Hit me up!"

I will leave now, but not before showing you what I made for my grand-nephew last week.  I have packed most of my big clothing projects away, so I was ready for a quick crafty project to calm my mind and fill a need for a birthday present for a 2-year old.  It was so much fun to make and went together with no problems (for an immediate sewers).  I hope he likes it, too!

Yoki wishing to meet his little boy today...

The dragon is named "Yoki the Fat Dragon" and was purchased from a shop on Etsy.  It was the first time I've used a pattern that was from a downloaded .pdf file.  The download went well and any intermediate sewer should be able to sew it together using the instructions.  I think I spent about 3 hours start-to-finish.  He turned out really cute, didn't he?  I filled him with buckwheat hulls, so he has some heft like a beanbag.  I wish I had stuffed his neck more because his head should stand up straighter.  I sewed everything closed, so putting more in now is out of the question.

"Hi, Everybody!"

I traced the pattern onto the white packing paper I had lying around, then glued it to freezer paper for a bit more stability.  It worked so well, I may try it again when I make another mouse.  The pattern pieces and extra fabric (single pieces cut out automatically on doubled fabric) are what you see in front of Yoki in the zip-lock baggie.  Making him was really fun, and I'm glad I bought enough fleece to make another!  The embroidery thread used to shape his big belly (and underbelly) is what gives him his round shape and the ability to stand flat footed.   My only hint is to pull these threads tight around him to give him real form.

His arms are not hinged, nor are his wings.  I wish the pattern had some marking that shows where the arms and wings should be placed.  I eye-balled their position based on the rear view of the finished dragon on the instruction coversheet.  You will need to do this, as well.  On my second version, I may consider changing how both wings and arms are attached.  I also think I will embroider his eyes.  I've got a new grandson arriving early March, so I need do the second version soon....!

Gotta run...!  Posting takes me sooooo much time, and I've got so much more to complete here before the big move!  Thank you everyone for continuing to check in on me.  Consider trying for the giveaway!  It's FREE!!!!!!!  All you need to do is leave me a comment.


Until then..
Keep it going...one stitch at a time!

Wednesday, December 7, 2011

Ask Santa for Something You Really Want

I love books.  I have collected far too many of them, but I do love them and can't seem to be comfortable without them being around me wherever I am.  The only thing I love more than books are books about sewing

For the past several years we have benefited from the existence of a place in northern California dedicated to patternmaking and the study of style.  Have you heard of The Center for Pattern Design?  If that special someone still has no clue what to buy you for the upcoming holiday, direct them to the book section of the CFPD website.   There are many rare book reprints and patternmaking books (for both men and women), software and DVDs ranging in cost $9.99 and up.  While you're there, check out their upcoming classes, tools and supplies, and sign up for their newsletter.  So many good things are happening there! 

And, when you have a moment, read the newsletter archives.   They have so many knowledgeable teachers planning to lead seminars and classes during the upcoming year (2012).  (Sato taught a class there last year; so don't forget to peek at the photos section to get an idea of what it was like in class.)  What could be more inspiring than taking a patternmaking class in northern California?!  (I know, I know...taking one in Paris..!  lol) 

I'm saving my money to get Harriet Pepin's Modern Pattern Design, a really hard-to-find authorized reprint.  I'd love to hear what books you placed on your wishlist, so leave me a note!  


Domino and I wish you a great Holiday Season and hope you get to squeeze in some needle time! 

Just remember, take it one stitch at a time!...

Friday, November 25, 2011

Pattern Placement is Critical

Okay,...I'm putting this out there as a work-in-progress because I need an excuse to post Thanksgiving Greetings to everyone reading a blog on this holiday.  Perhaps you're up early, have had a cuppa coffee and let the dog out....like me.  Special greetings to you.  Make sure you hug someone today...make it a good long hug where you are the last one to let go.  And, think of a good family memory.   

This also has a therapeutic purpose also.  If you've been following along for a while, you would have read how I am packing up my mother's home and preparing it for sale.  I will then collect my belongings from storage in the suburbs of Atlanta, and begin another phase of my life.  At this particular time, my creative time for sewing is extremely limited.  This blog is about one project that needs about two 4-hour blocks of time to bring to completion.   

Vogue 2960  (back)
Please ignore the floor...I know it clashes badly!

The dress is Vogue 2960 one of my absolute favorite vintage pattern reproductions.  The picture on the right is of the back of the dress.  I love the cabbage rose fabric I bought from Repo Depot a few years ago.  They offered the fabric with dark green, blue and (my selection) beige backgrounds.  I gravitated toward this fabric because I have memories of my paternal grandmother's living room drapes that had the dark green background.  She was the grandmother whose sewing machine (a Singer 401) I use to this day.  The construction process included serging all the inside seams, and (just prior to) completing the grosgrain ribbon waistline stay, I decided to include a petticoat.  The only steps remaining are completing and attaching the petticoat and creating the buttonholes.  The pattern instructs you to make bound buttonholes on the bodice front.  I didn't think the dress requires them.  Now, I understand why they selected this design feature.  One buttonhole is positioned so that the opening sits in the waistline seam.  I'm contemplating opening the seam instead of trying to work a machine buttonhole at that position.  It may be easier to make the bound buttonholes!  lol   I also could forget the button at that place and add a hook and eye.  I plan to wear the dress with a self-fabric 2" covered belt and buckle.  I also think I want to add one pocket large enough for keys or hankerchief.  There will be red heels, that I know...And dark green suede heels in the winter...! 
 

Vogue 2960 front 
shows importance of pattern placement
  Only after taking these pictures did I realize the importance of stepping back from your work,  I don't know if I will be able to get over the terrible pattern placement on the bodice.  If I had more fabric, I would certainly re-do it.  Repot Depot no longer does retail business, and I've nothing but scraps after making the petticoat bias binding.  

I had not yet discovered the great tutorial from Gigi Sews (miss you, Gigi)!  I wonder how much more fabric should be bought to accomodate possible fabric pattern matching?  Aha!...perhaps the answer is in the fabric and how often that particular pattern repeats.  Anywhere, there is noneof this fabric left in the universe, and I am torn between finishing it and investing in a shawl or calling it an official UFO.

So, the picture that follows is the last of the gathered notions and fabric required to complete this project.  The red grosgrain will be used between the petticoat tiers. 

Skirt and lower ruffle of petticoat plus notions
Depending on how long it takes to sell the old homestead may leave more time than I think.  You will see it finished, I just can't tell you exactly when.  There are quite a few of these project bags sitting around me right now.  Makes me really anxious to work like this....I'm more of a one-project-a-time sewist. Are you?  

I am invited out to dinner with old family friends and neighbors.  They moved into their house in 1957 on thiss block and have lived here every since.  Our family drove moved from Nebraska to California a couple of years later.  I grew up with their children, and their gatherings are legendary.  Real neighborhood celebrities and a great couple (see the June 2011 issue of Jet Magazine, wedding/anniversary section).  The food should be gooood!

I'll talk to you again, soon...
Remember, take it one stitch at a time....
And you'll be just fine...
I love comments and conversation...so if you feel so inclined....please do! 

Wednesday, November 9, 2011

Hidden Treasures

I listed the ad locally with the headline "Estate Sale of Hoarder 7am-2pm" and had moved tabled items and boxes around the driveway the day before.  It rained overnight--hard.  A very good friend was driving about 150 miles early that morning to help me.  She was late.  The first customers arrived at 4:30am....yes, that's right...four thirty in the morning.  They hovered at the end of the driveway like zombies, their black profiles moving closer to the garage in misty shadows.  I was a little un-nerved.  Finally, I yelled out the door and asked them to please sit in their cars until the opening time.  Seven o'clock came....I had no change...no posterboard signs had been scattered in the surrounding neighborhood hotspots.  The sun was barely up before the swarm started digging through the soggy cardboard boxes for treasures. 

One man bought all the costume jewelry in bulk.  A bunch of women started digging in the numerous hat boxes (my mother was a church-lady with far too many outlandish hats).  One women took all the tablecloths, napkins, and doilies.  Shoes, bags, unopened Fingerhut boxes, QVC boxes, HSN boxes and knicknacks (hate them...endless dustcatchers) were assaulted.  A set of leather luggage including the ladies' train case sat waiting their turn to be chosen among...pots....dishes...cut glass...handkerchiefs, gloves.....sigh.  It was endless.  And, I haven't mentioned the vintage lingerie she kept....you don't wanna know.

I will never do this again (if I can help it, I pray...).  My shoulders ache and my back is stiff.  It was three days of dust and standing for hours on cement.  Not enjoyable...But, many dealers are very happy...and $o am I.  I am packing up the homestead and readying it for sale.  My mother was a hoarder,...need I say more?  I had to sleep in the living room for the first 9 months after I arrived while I cleared out two bedrooms of 'stuff.'  This has been a true test...(required if you have a testimony, right?)

What was interesting from the sewing standpoint was to discover five trunks filled with my mothers sewing projects, finished and unfinished.  These are the type of trunks college students drag from home to house their belongings in dorm rooms during their college stay.  The trunks hadn't been opened in a long time, but the contents of all were in perfect condition.  The paper bags protecting all this polyester fabric (remember, the 70s ushered in the leisure suit era) reminded me of the many fine fabric stores that were part of my young sewing experience.  Their names and logos I had long forgotten, and I quickly realized we had access to multiple fine fabric stores--not like our meager selection today.  I'm thankful for the Internet.  My mother had a lot of vintage patterns...not the 40s and 50s I love, but quite a few in the 70s.  I cringed as the best diggers pulled out some thread, trim or pattern I had missed.  None of the remaining patterns are my size, but I plan to use them as giveaways after I confirm their condition, so stay tuned!

Needless to say, not much sewing is being done here.  I had hoped to complete more projects before I must pack my machines and projects away.  What you may see is more of my handwork or travelling projects.  Who knows, I may have more time than I think.  After all, the economy being what it is, the house may be on the market for a while.


They come in multiple colors, too!
 I don't want you to leave until I pass along one of my sewing favorite things.   Take a hard look at the picture.  What are they?  If you've ever purchased a balloon at a party store, these are the optional weights that can be attached to the balloons to prevent them from floating away.  I use them as pattern weights.  I just love the colorsplash they bring as I cut out my patterns. 

The conical weight (see the grey unwrapped weight lying on its side) can be removed from the Mylar and wrapped in ribbon or embellished with anything that makes you smile.  Let the hot glue gun be your friend.  Be sure to glue felt to the bottom to prevent the rough stone from snagging your fabric, and cover sides of the weight with anything your heart desires.  The set I use fits neatly in a custom decorated box or at times, have been lined them up a shelf like well-dressed sewing room soldiers.  The pouf on the top has its advantages, and makes it easy to grab and re-position them.  I've been collecting them from miscellaneous birthday parties or anniversary celebrations for a few years.  If you must purchase them, they are approximately $1 each.   

As part of my garage sale preparation, I opened a box containing a pattern system I had never heard of.  Has anyone heard of this company or used this system?  The back of the book in the picture below says it was The Perfect Fit Publishing Company 1971 (revised 1975 - 530 5th Avenue, New York, NY  10038). 

Front Cover of book, touting the "Exclusive Over Lay and Trans-Dart Method


Like the Lutterloh system, this has a special ruler and miniature patterns to follow.
 It seems to be no longer in business, but if anyone can provide more information on this company or system, I would be interested in hearing about it.


Domino asks little from me....as long as I am continually touching him.
In this case, my feet will do just fine.
 Like CBSs "Sunday Morning,"  I'd like to leave you with a funny, nature moment.  My dog wore himself out imagining all our garage sale visitors came specifically to see him.  He performed his " Ain't I adorable" antics for each and every one who visited.  They allowed him to jump up on them (muddy, wet paws and all) and encouraged him to lick them in the mouth and he took advantage of stepping beyond the hours and hours of training he has endured to break these horrible habits.  lol 

At the end of the day he was so exhausted he didn't think about eating dinner!  Neither did I!....It has taken us both a couple of days to recover, and my excuse is my age. He's only three so I don't know what his issue is...you'll have to ask him..:)

I’ll talk to you again, soon….
Thank you for visiting! 


                  Stitch on…
you’ll get there…just make progress taking each
One at a time….

Saturday, October 22, 2011

I Sew Other Stuff, Too....

From time to time, my sewing projects are things other than garments worn by me or my family.  I am happy to share a sewing project that should take an hour or two of your day and allow you to let off a little steam after a lengthy and complicated project.  With the recent release of the new McCalls Holiday Collection patterns the blogosphere was all abuzz.  I had also received my McCalls e-newsletter, and wanted to stop a moment to share what new things I noticed when I clicked on the link. 

I drooled over the new pattern for 18" doll clothes (aka the American Girl Dolls line)!  Those clothes looked so cute and up-to-date, I wished my niece was young enough to still play with the American Girl doll I bought her when she was 7 or 8 years old.  She is older now, just out of graduate school, yet she remembers getting that doll as a present.  I might have to find some naked 18" doll to sew for!....lol

I liked a few of the new Misses party dresses I saw in the collection, but I grinned when I saw that McCall's added a new pattern by one of my favorite patternmakers.   At the very end of the new pattern group was the cute little photo below....  This hippo and elephant pattern are examples of the animals from Carol's Zoo!  I met Carol as a vendor at a quilt show many years ago.  I am delighted to recommend her fun, unique and superbly-drafted patterns to you.  This lady has found a way to draft these animals with as few pattern pieces as humanly possible.  After taking the patternmaking class at the local college, I was amazed at their construction!  You will be, too!
McCalls 6484
Photo courtesy of McCalls.com


I was so excited to see Carol getting the recognition she deserves!  I have made the hippo from a tapestry fabric and used a coordinating tassel for his tail. He is soo cute, and made from 3 pattern pieces!


Last year, I made her mouse pattern (only 2 pieces!) in 90 minutes and was so pleased with how little time it took and how ingenious her pattern was.  She has designed an entire zoo of different animals, most of which have less than 4 pieces, and I encourage you to visit her shop while she is offering a 25% discount for any of her specially identified "pink" fur in honor of October's Breast Cancer Awareness Month.
 
Carol is a cancer survivor, and is such a nice woman, I would love to have her meet all of you and introduce you to her as a great source of beautiful and unique faux furs, excellently-drafted animal patterns, and lots of safety-designed eyes and noses for your stuffed creations.  She sells the patterns alone, but also has kits with everything you need to make a mother and child of each animal.  Don't forget to give her a look-see!

Look at the mouse pattern below for the mouse I made last Xmas:

Mama Mouse and Baby Mouse
photo courtesy of Carolszoo.com
 And, below is a picture of my grandson, the happy recipient of a new friend.  What did I do differently?  I put pipecleaners in his tail and filled his body and head with buckwheat shells from an old pillow I had.   He has enough heft in his bottom to sit, hold up his head and not fall over.  His whiskers are extra-long lengths of overwaxed black carpet thread.  I believe he has been named Eek, and I am more than delighted to see my grandson still has him (and his camouflage ribbon) when I requested a picture of them!  I loved making it!  Only one hour to create such delight.  Grandmas live for these moments!


Baby Mouse in Dining Room Early in the Morning


Baby Mouse Named Eek and my Grandson


Thanks for stopping by...! 
and keep stitching....one stitch at a time!

Tuesday, October 11, 2011

Fabric Selection is Key....


The journey toward the completion of this project went awry due to my inattentiveness to the "suggested fabrics" printed on the back of the pattern envelope.   This garment stalled because the weight of the fabric I chose affected the garment's final finishing touches.  Let me first confirm what the suggested fabrics for the top were:  charmeuse and crepe de chine.  I knew what both fabrics were, having worked parttime in fashion fabric stores (and sewn) for many years. I bought a beautiful piece of yardage from Gorgeous Fabrics I thought would be great and began the project.   (Thank you, Ann!)
Vogue 1039

I usually study a pattern before I begin to sew and I mean study---not just look at.  If I understand all the steps, the instructions become a guidepost to the sewing process and are referred to as a reminder of the construction sequence.  My sewing improved the minute I adopted this practice.  I definitely caused myself problems if I started to sew something when I didn't fully understand the instructions.  Nothing is worse than looking at the instructions in Step 'x,' and not understand what on earth they are asking you to do!  Hate it!  

During the time I spend studying the instructions, I make notes on the instruction sheet of the places where I plan to add or change a design feature or sewing technique.  I make written notes for things like label placement, where and how I plan to finish seams, how I plan to transfer the all-important dots, squares, and triangles (both large and small) from the pattern to fabric, and what colors will represent each shape.  Often I use different marking mediums; choosing between the chalk, crayon, tracing paper and/or tailor tacks that could all appear in the same garment.

My goal when I sit down at my machine is to change threads between the straight-stitch and overlock as few times as possible.  I sew in what I have learned are called 'units.' I begin with completing all the stay-stitching (or doing double-rows of gathers), attaching interfacing, then end by finishing all the seams.  Any foundation or detail work is usually done next (thread tracing, basting, pad stitching, welt openings, bound buttonholes, etc.).  Depending on the type of garment, these steps vary.  When I can put all the 'units' together without having to stop to baste, interface or pre-finish anything, I really feel my sewing session has been productive and it appears as if I accomplished a lot.

Because of how I work, my son has always thought I was an amazingly fast sewer.  He would wake up in the morning and he would have a new shirt after seeing a stack of fabric beside my sewing machine the night before.  He had no idea there was a lot of 'pre-work' being accomplished before he noticed the garment in-process.  I didn't think he was paying any attention!...lol.  This myth was uncovered when I began sewing Halloween costumes for my grandchildren.  He now knows how much time and love is invested in a Mom-made garment.  I had that superwoman illusion going for a loooonnngg time, didn't I?!  psssst...he'll be forty as of this Sunday!!!...((grin))  Happy birthday, son!

Neckline View
Bosom Toward Toes on Dressform
This pattern was categorized as being "Advanced/Plus Difficile" as far as Vogue's skill level estimates go.  I wouldn't say it would be more accurately described as 'tedious.'  This squared-neck tunic has 10 pieces; which I should have recognized as the first indicator it was going to challenge me to carefully handle the bias edges, tiny pleats, and gathered strips that are part of the design.  My disappointment has to do more with the way the neckline's pleated yoke was made unnecessarily complicated.  If I were to remake this garment, I would definitely re-draft it and omit the yoke's pleats.  This design has the front and yoke facing sewn together and finished with understitching at the neckline edge.  The pattern then instructs you to make the three box pleats in the front.  Next, the instructions say to stabilize the pleats at the front neckline (the three pleats can be seen in the picture above) by centering and stitching the pleats at the top neckline edge and again about 3 inches away around the yoke bottom.  This top almost became a wadder right here. 

The beautiful fabric I had selected was to lay smoothly at the neckline, and the top of the pleats were to be kept stationary by topstitching through all six layers of the pleats in the front and continuing on around the three other sides of the neckline.  You know I complained to myself, "There must be a better way!!!"  This was where I realized my fabric would not lay smoothly or appear as a single layer because it had much more 'body' or 'heft' than the fabric pictured on the envelope.  Well,....I thought about picking the yoke, front and pleats apart, removing the yoke facing pleats entirely and encasing pleats at the neckline in a neckline seam with the unpleated inside yoke.  I decided not to.  I ultimately concluded I'd done enough to make this garment any more different or unique. I blame myself for not picking a tissue weight fabric and missing the construction of this design element while I was 'studying.'  I do like the top, though.  The fabric feels sooo good, and I like the added color detail because it's slimming.  I have made written notes all over the pattern instructions in case I try it again to remind myself to use my alternate solution for finishing the neckline.  Moving on....  Here are some final garment pictures. 


Front


Back


Time to share......I went to the Pacific International Quilt Festival XX at the Santa Clara Convention Center this past weekend.  What fun!    Now, I'm not much of a quilter, specifically....but I do admit loving to be around creative energy, and am always awed by the meticulous handwork of women (and more and more men) world-wide.  This is the largest quilt festival on the west coast, and is the gathering place for enthusiasts from all over.  The adjacent hotel is filled ladies dragging rolling carts flashing credit cards used exclusively for this four-day annual event.  I was with a good girlfriend of mine who has similar creative interests (quilts and purses/totes) so, we were able to leisurely stroll every aisle and look for new products and notions in addition to admiring hundreds of quilts.  We stayed all day...dragged our old legs home after walking that cement floor all day!  .... Loved It

...Remember, just keep sewing!
                               one stitch at a time....

Monday, October 3, 2011

All It Took....

Wow!  You came back to see what happened?!  Thank you so much!

Well, I've completed the Issey Miyake jacket and am anxious to show you the winning buttons and my next project.  Ummm.....let me see, where were we???.....Oh, yeah....Wasn't it here?...

I love my Singer automatic buttonholer!
 Here you see my trusty Singer buttonholer making one of the five buttonholes on the collar.  Both layers of the collar were handled as one, and adding a piece of tear-away stabilizer kept everything in line.  Doing these buttonholes and sewing on the buttons took an hour or so...no time at all.

What will surprise you if you make this jacket?  I was surprised to find that this jacket has what the instructions call a gusset under the sleeves.  I had no previous experience with this type of gusset, and wondered why the designer would choose to use it here.  Now, as I give the jacket its final press, I understand the function of this design choice.  As I smooth the jacket on the dress form, I notice the kimono sleeve falls smoothly from the dropped shoulder because it is supported by the gusset and undersleeve and there is no underarm pinch visible when the arm is moved. 
I was also surprised there is a tie belt in the back.  I'm not a 'tie-belt-in-the-back' kinda girl.  I am old enough to have lived when girls of elementary school age were required to wear dresses to school.  And, at the time, almost every little girl's dress had waist ties which were secured in a big bow just before you left for school.  I always managed to come home with one torn and scraggly tie hanging from a rip at the side seam or (at minimum,) left dragging loose in the dust behind me--the bow a distant morning memory.  I always got in trouble for this and seeing them brings back my mother's disappointment (once again) in my wardrobe malfunction and proof of some unladylike activity. 
So. as an adult, when the patterns I select have ties in the back, I usually omit them.  I used them in this case because the boxy style of the jacket needs some waistline shaping.  I also confess I may have selected the wrong interfacing, and wish I had selected a softer one to use at the cuff and hemline.  The interfacing used on the front facings is fine being stiffer or crisper, but the sharpness is not needed any other place, so I wish I had substituted a different one. 


So...here is the finished product.--------------'>'
I apologize for the poor-quality pictures.  The browns and oranges are so much more vivid than they appear here.  I'm getting better and better at taking them, so bear with me pleeze...:) 

What button did I use?  I totaled all the votes received before midnight Sunday, and the winner is.........


Four-hole 3/8" shell
button
The tiny speckled shell button is the one selected by a majority of votes.......;)   I sewed the button over a round toothpick and wound thread between the fabric and button back to create the lift I wanted to avoid any pull or imprint on the fabric surface.

Jacket Back with Tie Belt

Lining and Welt Pockets
 I pulled a little of the pocket lining out of the pocket on the left so you could see the welt positioning.  They turned out really well in spite of me not doing any for a while.
And, my label at the back of the neck....the signal of the project coming to its conclusion.  I won't be making the pants included in this pattern, but I have several pairs of linen pants (i.e., white, ivory, copper-colored) that will coordinate well so I can wear it into California's fall weather. 
I'll get better at explaining myself and documenting my work without making my posts picture heavy.  Leave me a message if there's anything I can describe in more detail or clarify. Thanks for going with me!

*****

Next, I'll be sharing how the top mentioned in my first blog turned out (Donna Karan Vogue 1039).  This top was the last garment begun without knowing anything about a Full Bust Adjustment (FBA)---which I found out was one of the first things I need to make.  I was taking a sewing class at the local junior college and at the time, this top was what I was working on in my personal life.  It won't have that FBA, but I'll share the process of sewing the last garment cut out in a larger size to accomodate the alteration.  I'm happy that I now know much more about the pattern-making and altering process and can make accurate changes in garment design that work for my body.  It has also helped me incorporate different construction techniques (couture or manufacturing) into my projects.  I'll show you what I mean when we discuss this design.  I'll need your opinion on some things, too....so, don't forget to check back.  I looovvvve company......!

Til then....
Keep going!...one stitch at a time....